

Edwardian Townhouse Kitchen
Kitchen Renovation Project
As you witness your kitchen gradually falling into disrepair and the trendy distressed look starts to take on a new meaning; there comes a point when you have a need to hit the kitchen with a bag of dosh; some builders; kitchen designers and flooring tradesmen.
Magazines (like 'Period Living and Traditional Homes') encouraged the little grey cells with fresh ideas and sources of potential kitchen paraphernalia. After some months of research, we decided that not only did the kitchen need a make-over, but so did the flooring in the hall and if we were to put down an entire new floor between front and back doors, then we would need to lay a new water pipe (the current pipe being at least 50 years old) from where the main pipe entered our land; up the path, hall, under the stairs and finally under the kitchen floor to connect with the supply in the house. In other words, we needed to renew the front path as well.
The simple kitchen revamp was turning into a sizable mini project. We deliberated on whether we really needed to renew the water pipe as we knew it wasn't lead. This would save us nearly £2,000. In the end we decided to go with a gut feeling that if we put down an expensive flooring, you could bet that the water pipe would spring a leak. The water pipe had to be done.
Diary of the Kitchen Renovation
Week 1: November 12th, 2007:
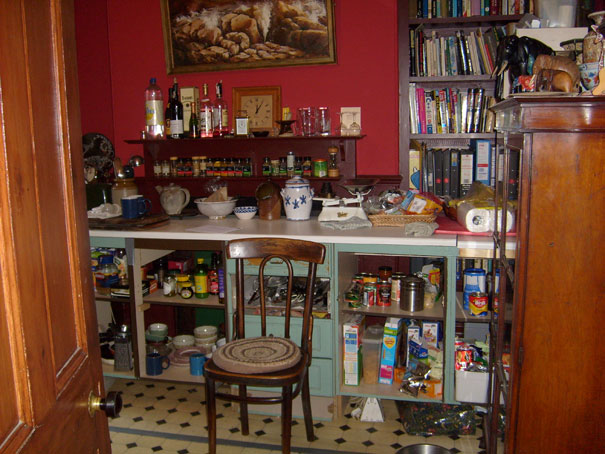
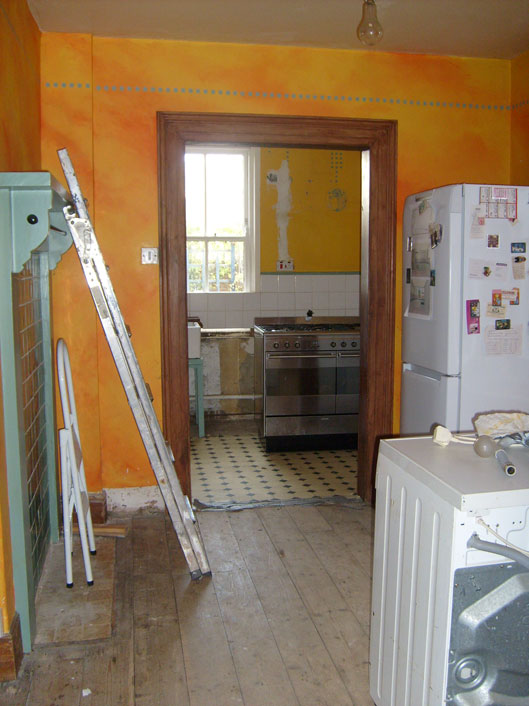
The temporary kitchen is up and running and all non vital kitchenalia packed for the duration. The cooker, washing machine and fridge have been moved to the hall. The door to the kitchen is sealed with duck tape. The builders arrived and immediately set to work removing the old concrete path and digging down to the old water pipe. Our entry and exit would now be via the back of the house for the next week.
Once the pipe was exposed we discovered that there was also an old gas pipe (not in use) and surprise, surprise, a small water leak where the pipe to the house joined the section under the pavement. The new Alkathene Pipe went in, but it took some persuasion to get it under the house because the foundations had been created using a very hard stone.
Overnight, a local cat obliged us and left its signature paw print on the new path!
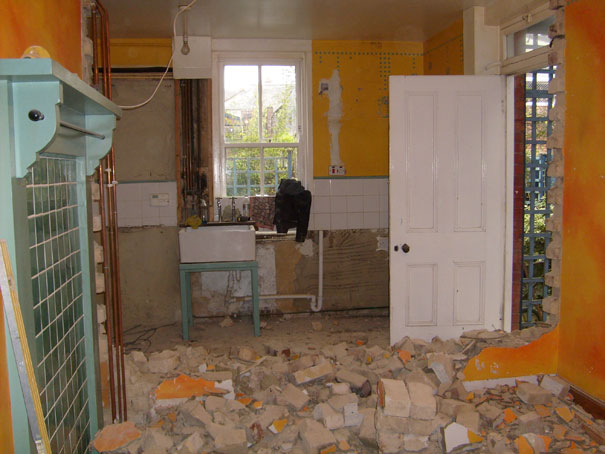
Work commenced on the kitchen proper with the demolition of the wall between the kitchen and the dining areas. (It had already been established that it was not a load bearing wall). This exposed the gas and central heating pipes by the chimney, which ran at picture rail height around the kitchen wall until they connected with the water main pipe and went out through the wall to the boiler in the outside lean-to. These pipes would be redirected through a ducting box constructed in a trench across the concrete section of the kitchen floor. All the rubble is manhandled out into the small Courtyard Garden, ready for the first planned rubblish removal. This meant I had a cleared garden over the weekend.
Week 2: November 19th, 2007:
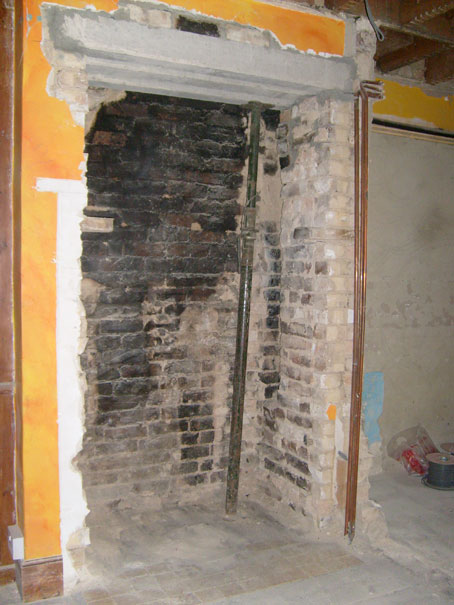
The second week continued with the demolition. The ceiling was removed exposing the joists and the inner section of the chimney breast was carefully removed.
Hidden in the chimney was an old back boiler, which was the height of luxury when the house was built in 1907, but was now defunct. We were already aware that the back boiler existed and had informed the builder on our spec sheet for building work quotation. However, this is typical of the kind of 'extra cost' that could be incurred. Therefore, it would always be wise to assume a contingency fund to cover such incidents.
Three lintels were inserted to spread the load and to ensure safety; acrow props were used as the bricks were removed one by one.
Once the plumber had moved the pipes and all the walls had been prepared, the last of the rubble was removed. As the joists were exposed, the wiring for the lights was re-routed and then the ceiling boards were nailed up. The plasterers arrived during the evening and hey presto, we had a new ceiling.
Week 3: November 26th, 2007:
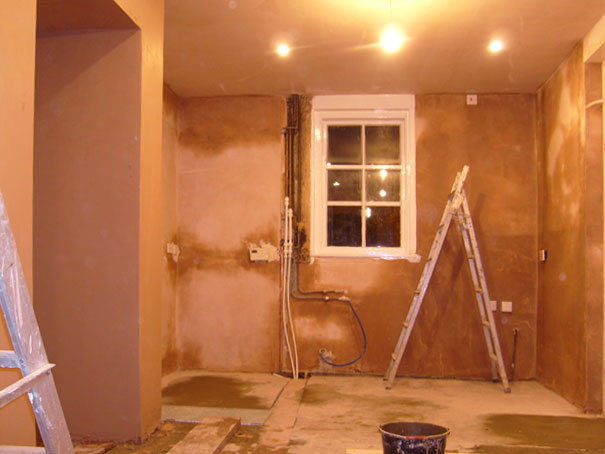
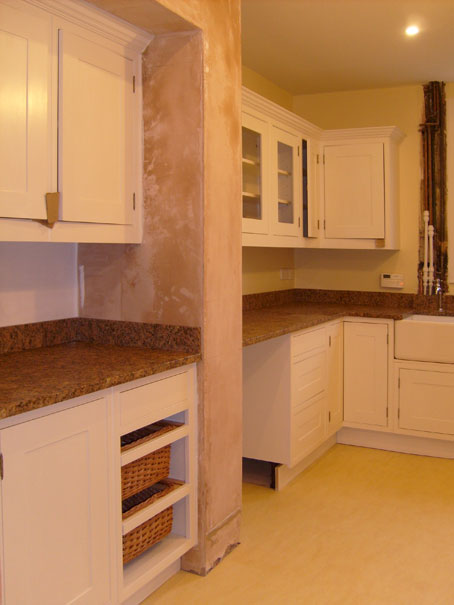
The replastering of the walls was completed and left to dry. The pipe trench was covered and the concrete part of the floor leveled. Holes were carefully cut into the now dry ceiling and the six eco-friendly spotlights using 11 watt low energy bulbs (total 66 watt) were installed around the edge of the room on their own circuit. Two centre lights on a separate circuit, would complete the lighting.
A new hardwood victoriana style back door was fitted complete with an old fashioned 'Rim Lock' with brass handle and additional deadlocks to meet modern safety standards.
During the weekend, the room was cleaned and I painted the walls white. This would provide a fresh undercoat for the coloured topcoat.
Week 4: December 3rd, 2007:
The builders were finally able to lay the 9mm hardwood marine ply over the entire kitchen and hall floor. The new kitchen units arrived on the Tuesday, boxed, already assembled and primed for painting; only delayed by one day because the concrete floor had not completely dried.
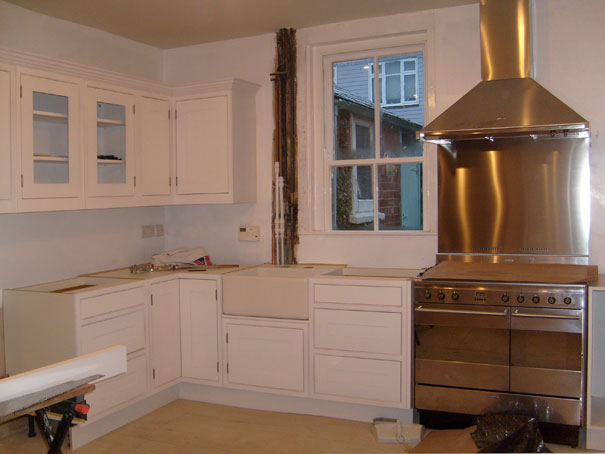
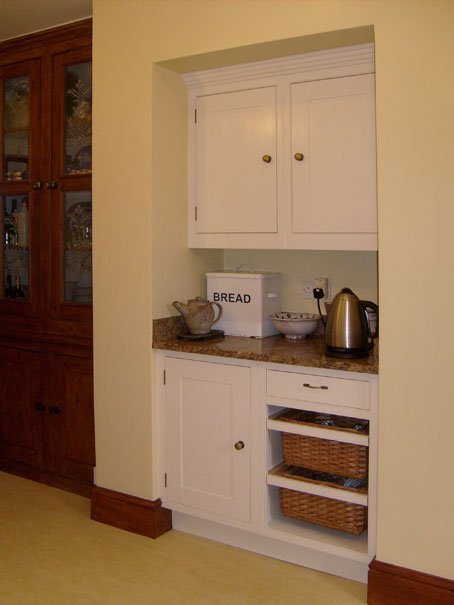
We chose a style called 'Boston' from a range made by Prentice Furniture Manufacturers Limited, which was ordered by local kitchen designers and fitters, Willow of Newton Abbot Limited since stopped trading.
This style was selected because it would blend in with the original edwardian cupboard; a simple traditional design using modern technology that would sit comfortably with the age of the house.
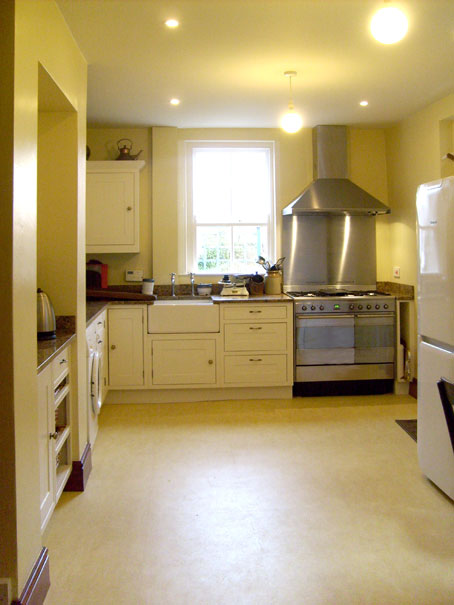
Two years ago we purchased our Smeg cooker, so we only needed to buy a suitable hood and splashback. The old hood did not cope with the volume of extraction required and it was too noisy!
Important advise when choosing an extractor hood:
Make sure the hood is able to extract the correct volume of air. To calculate the volume of the kitchen, multiply the length x width x height of the kitchen (in meters) and then multiply that number by 10 (times per hour the extractor filters the air) and you have calculated the extraction rate expressed in cubic meters per hour (m/h). My kitchen volume is 48.25 cubic meters; therefore the extraction rate required is 500 cubic meters per hour minimum.
By the end of the week all the units, cornice and belfast sink were fitted. Only the plumbing for the taps and drill the hole for the extractor vent to do. Whilst the kitchen is fitted during the day, I've been painting during the evening. The ceiling has been painted in Homebase 'Ivory Linen' Classic interior emulsion paint; a soft off-white colour that is more sympathic with the older style property. The walls were painted in Crown 'Jersy Cream' emulsion for kitchens and bathrooms; a soft warm yellow. It is important to increase the feeling of light and warmth in this room as it does not receive any natural sunshine and faces north.
Week 5: December 10th, 2007:
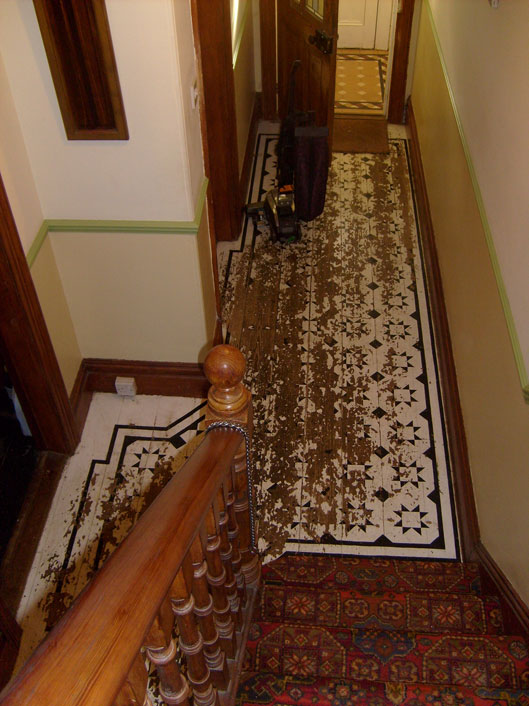
After considering all the various floor covering options, we finally decided upon Forbo Marmoleum for its natural bactericidal properties and ease of cleaning. It is also very tough, does not become a skating rink if wet and copes with my springer spaniels. Flooring specialists Flooring & Carpet Centre (previously called Flooring and Tile Centre) fitted the floor tiles.
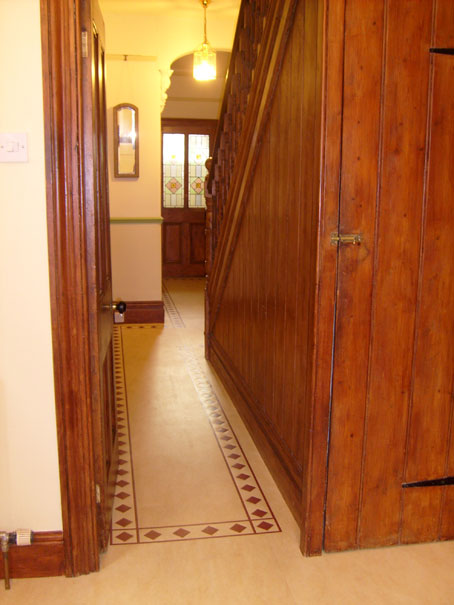
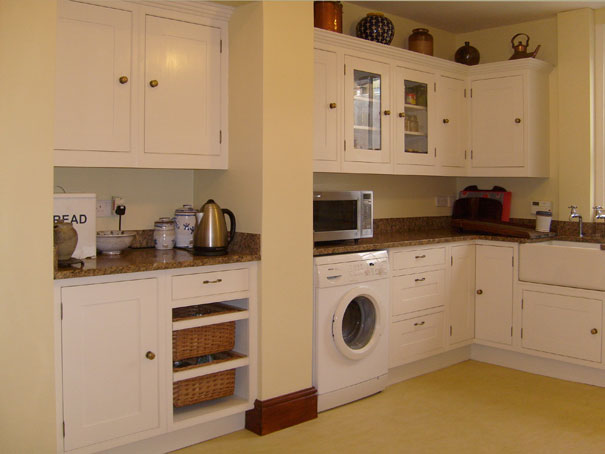
The entire kitchen was covered in 50cm sq tiles in the colour 'Butter' and the hall received a little bit extra treatment with a border in the colour 'Brick'. I have found it really useful to have a continuous flooring throughout the hall and kitchen, as sweeping and cleaning is quick and easy. The border naturally defines the two areas and picks up the red diamonds in the stained glass and the teak stained woodwork. As you can see, the old floor in hand painted black and white geometric design had seen better days.
The day after the floor was finished, the granite worktop arrived. It was cut and installed by local company Stone Cladding International Masonry Limited. We chose 'Giallo Veneziano' for its warmth and interesting pattern, which coordinated with the flooring, wall and cupboard paints and wood stains. They also fitted the upstands, which was chosen in preference to tiles. Tiling would have been too busy a pattern next to the granite and would only have detracted from its character.
The kitchen fitters returned to tidy up loose ends. The taps are now fully installed; the hood extractor works; the washing machine has been connected.
In searching for just the right knobs and door handles that complimented the age of the property; the design of the cupboards and the colour of the hinges, I discovered Broughtons of Leicester. They provided an excellent service and top quality fittings for my cupboards and drawers. It is important to spend time and attention on the finishing details as they will enhance and add period atmosphere to your home. So with the knobs and handles attached I have a functioning kitchen again....yehar.
At this stage I was still finishing the painting as one wall around the chimney just took ages to dry.
Week 6: December 17th, 2007:
It's only a week until Christmas, so I attached the new skirting, finished painting the walls and unpacked the kitchen again. The temporary kitchen was dismantled and the last removal of the old kitchen was done. I decided to wait until the new year before staining the skirting and building a boxed cover for the pipes near the sink.
A clever tip on how to hide cables and pipes:
I constructed a simple 3 sided box using plywood, but mdf could have done the job. It was painted prior to installation. I then attached the box to the wall using strong door magnets. It holds fast, no nails visible, yet is easy to remove and replace...just in case without needing to use any tools nor repaint.
New Year - 2008 - New Kitchen
|
|
|
Ten years have now come and gone. In 2018, I spruced up the kitchen, it was completely repainted in exactly the same colours. It still looks as good as new. The kitchen units are still perfect; a testament to an excellent product. I've now added new glass pendant lighting and acquired a new cream coloured retro styled fridge-freezer made by Gorenje. The work area layout has been a resounding success.